Home Row Typing: Finger Placement and How to Practice
By A. Pepper, CEO of Type Click Tests ·
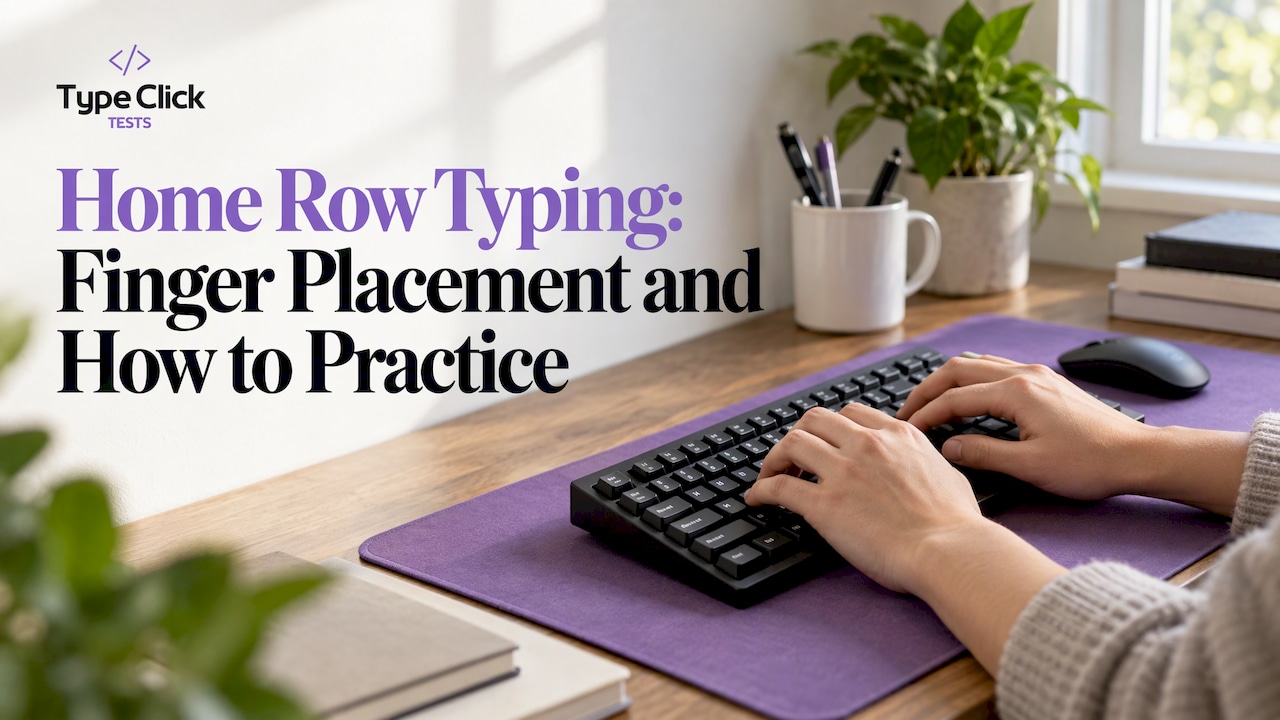
The home row is the middle row of letter keys, and touch typing starts there. Rest your left fingers on A, S, D, F and your right fingers on J, K, L and the semicolon key. Rest both thumbs on the spacebar. Every other key is reached from that position, and your fingers go back to it after each stroke. Learn this one posture and the rest of the keyboard falls into place. You can check it with a timed test on Cheetah Typing Test, which needs no signup and shows your speed and accuracy as soon as the clock stops.
TL;DR
- The home row keys on a US QWERTY keyboard are A, S, D, F (left hand) and J, K, L, ; (right hand). Thumbs go on the spacebar.
- Find the position without looking: your index fingers sit on F and J, the two keys with a small raised bump.
- Each finger owns a column of keys. Reach out from home, press, and return home.
- Practice slowly and accurately first. Speed comes after your fingers hit the right keys out of habit.
- Short daily sessions plus a weekly timed test show whether your placement is working.
Table of Contents
- What the home row is and which keys it includes
- Where each finger goes
- How the F and J bumps find home for you
- Reaching the rest of the keyboard
- A practice routine for the home row
- Accuracy first, then speed
- Common home row mistakes
- Numeric keypad finger placement
- Practice with real feedback
- What progress looks like
- FAQ
- Sources
What the home row is and which keys it includes
On a standard US QWERTY keyboard, the home row is the row that starts with A and ends with L, directly under the row that starts with Q. The “home” part means it is where your fingers wait between keystrokes. Dictionary.com defines the home row as the row of keys the four fingers of each hand return to, which on QWERTY means A, S, D, F and J, K, L, semicolon.
You will see two counts, and both are correct:
- The eight home keys. A, S, D, F, J, K, L and ;. These are the keys your eight fingers rest on.
- The nine home row letters. Computer Hope’s home row reference counts nine letters in the row: A, S, D, F, G, H, J, K and L. G and H sit between your two hands and are pressed by your index fingers, which stretch sideways to reach them.
So when someone asks “what are the 8 home keys,” the answer is the eight resting keys. When someone asks which letters are in the home row, the answer is those nine. The same page notes the row also holds keys such as Caps Lock, the apostrophe and Enter, but those are not resting positions.
The layout matters. These positions are for QWERTY, the name that comes from the first six letters in the top-left of the letter block, as Lenovo’s QWERTY glossary explains. If you use a different layout, your home row letters will differ, though the idea is identical.
Where each finger goes
Each finger has one home key. Learn the pairing once and say it out loud if it helps.
| Hand | Finger | Home key |
|---|---|---|
| Left | Pinky | A |
| Left | Ring | S |
| Left | Middle | D |
| Left | Index | F |
| Right | Index | J |
| Right | Middle | K |
| Right | Ring | L |
| Right | Pinky | ; (semicolon) |
| Both | Thumbs | Spacebar |
This matches the placement in Computer Hope’s finger-placement guide, which also notes that thumbs can hover just above the spacebar or touch it lightly. Whichever you choose, keep it consistent. Either thumb can press the space.
A few posture details help your fingers stay loose:
- Curve your fingers gently, as if holding a small ball. Flat or stiff fingers are slower to move.
- Keep your wrists level and relaxed, not bent up or resting hard on the desk edge.
- Let the fingertips, not the pads, strike the keys.
- Keep your shoulders down. Tension in the shoulders travels to the hands.
How the F and J bumps find home for you
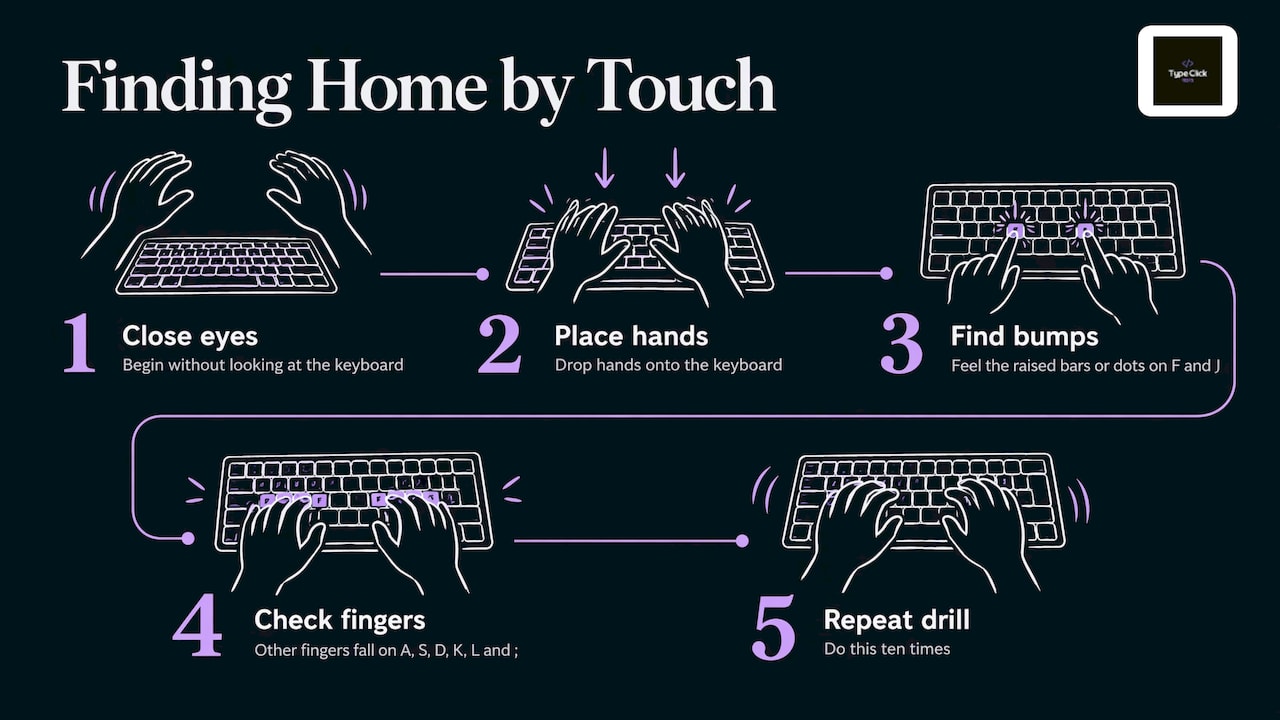
Look closely at F and J and you will see a small raised bar or dot. Those are guide keys. Computer Hope explains that you move your index fingers over the keys until you feel a bump on each. Once both are under your fingertips, your hands are in the right place without a glance at the keyboard.
This is the habit that separates touch typing from looking down. If you lose your place mid-sentence, do not look at the keys. The University of Wollongong’s touch-typing guidance says to slide your fingers until they find the raised tabs on F and J, then reposition from there. It also advises limiting hand and finger movement to what is necessary, which improves speed and reduces stress on the hands.
A quick drill: close your eyes, drop your hands onto the keyboard, find the bumps, and check that your other fingers fall on A, S, D and K, L, ; naturally. Repeat ten times. It takes about a minute and builds the reflex everything else depends on.
The idea is old. Wikipedia’s touch-typing article credits court stenographer Frank E. McGurrin with reportedly inventing home-row touch typing in 1888. Bumps on the index keys are now standard on most modern keyboards.
Reaching the rest of the keyboard
The home row is a base camp. Each finger covers the keys in its own column and nearby diagonals. As the O’Reilly book Practical Vim puts it, with your fingers poised on the home keys you can reach any other key without moving your hands or looking at your fingers. That is the ideal touch-typing posture.
Here is how the work is divided, based on the key assignments in Computer Hope’s guide:
| Finger | Home key | Also responsible for |
|---|---|---|
| Left index | F | 4, 5, 6, R, T, G, V, B |
| Right index | J | 6, 7, Y, U, H, N, M |
| Right pinky | ; | 0, P, /, -, [, ', ], Backspace, \, Enter |
The remaining fingers cover their own columns: for example, the left pinky handles A and the keys above and below it, and the ring and middle fingers do the same in their columns. The pattern is simple. Keys above the home row are reached by moving the same finger up, keys below by moving it down, and then it comes back.
Two habits make this work:
- Move one finger, keep the others anchored. When your right middle finger reaches up for I, the rest of your right hand stays near home.
- Return home after every reach. The return is what keeps your aim reliable on the next key. Fingers that wander and stay wandered turn into hunt-and-peck.
If you want to see how much that habit changes results, touch typing vs hunt-and-peck walks through what actually moves your words per minute.
A practice routine for the home row
The goal is to make the positions automatic. Here is a plan that works for students, professionals and anyone who wants steadier typing.
Step 1: Take a baseline
Before you change anything, take a short test and note your speed and accuracy. The 30 second typing test is quick enough to repeat. Write down your score. That is the number you are trying to beat, and your accuracy figure matters as much as the speed one.
A baseline also shows you where you start. Indeed’s typing guide reports that people just beginning to type regularly may sit around 30 or 40 words per minute, and that regular practice can raise this to 60, 80 or more.
Step 2: Drill the home keys alone
Type patterns using only the eight home keys: asdf jkl; asdf jkl;, then short real words such as sad, fall, flask, dad and alfalfa. Look at the screen, not your hands. Stay slow enough that every keystroke is correct. The point is to teach each finger its key.
Step 3: Add the neighbors
Once the home keys feel natural, add one reach at a time: E and I, then R and U, then T and Y. After each reach, bring the finger back. Combine the new letters into words you actually type every day, such as your name, your email sign-off or common phrases.
Step 4: Cover your hands
Indeed suggests laying a cloth napkin or dish towel over your hands so you cannot see them, and timing yourself in 30-second drills. It sounds simple, and it works because it removes the temptation to peek. If you lose your place, use the F and J bumps to reset.
Step 5: Give the weaker fingers extra attention
The University of Wollongong notes that the ring and pinky fingers are considerably underdeveloped and undertrained, so they deserve more attention during training. Spend extra drills on words heavy in A, S, L, Q, P and the semicolon. Type in an even rhythm, like playing a piano, and speed up only once your fingers hit the right keys out of habit.
Step 6: Re-test weekly, not hourly
Retesting after every drill just shows noise. Indeed recommends taking free online tests every week or two to track improvement. A good pattern is the 1 minute typing test as your standard checkpoint. Later, the 3 minute typing test shows whether your form holds as your hands tire. For a day-by-day plan, the daily typing practice routine fits into ten minutes.
Accuracy first, then speed
Most people who start home row practice want to go fast immediately. Resist that for the first couple of weeks. A mistake costs more than the time to press Backspace: you have to notice it, stop and fix it, and your rhythm breaks.
Indeed makes the same point: typing a word correctly the first time reduces the need for proofreading later, and preventing the mistake is easier than finding it afterward. Accuracy-first practice builds consistency, and speed follows. Indeed also notes that words-per-minute calculations account for uncorrected mistakes, so sloppy fast typing does not score as well as it feels.
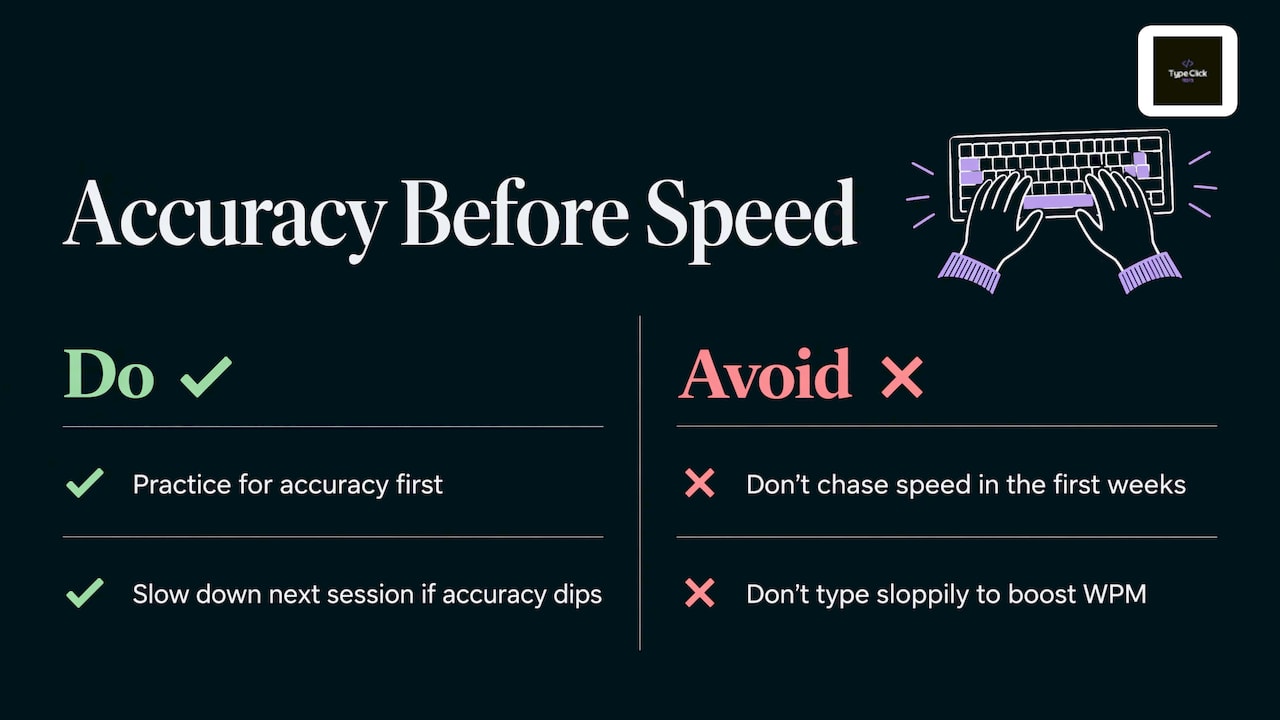
A practical rule: if your accuracy in a test falls below what you are comfortable with, slow down for the next session. If you want to go deeper, read why typing accuracy matters more than a headline WPM and how to type faster without losing accuracy.
Common home row mistakes
- Looking down at every key. Use the screen. If you are lost, find the bumps by touch.
- Letting one finger do everything. Typing mostly with two index fingers is a habit, not a technique. Assign every letter to its proper finger even when it feels slower at first.
- Not returning home. Your hands drift until the next key is a guess. Return after each press.
- Pressing with the wrong thumb habit. Pick either thumb for space, but keep both thumbs near the bar so they do not pull your hands out of place.
- Ignoring the pinkies. The semicolon, P, Q, Enter and Backspace all belong to pinkies. Skipping them causes slowdowns on punctuation.
- Rushing. Speeding up before your fingers are certain bakes in errors.
- Tense hands. Gripping and hovering high increase strain. Keep the movement small and the fingers relaxed.
The QWERTY layout is not built around the home row. HandWiki’s article on the Dvorak layout says only about 32% of letter strokes on QWERTY fall on the home row, versus about 70% on Dvorak. That is why QWERTY typists need good reach-and-return habits: you will leave the home row constantly, so returning to it is the skill.
Numeric keypad finger placement
If you enter numbers all day, the keypad has its own home row. Rest your index finger on 4, middle finger on 5 and ring finger on 6, with the thumb on 0 and the pinky handling Enter and the plus key. The 5 key usually has a bump, just like F and J, so you can find the position without looking. Use the same reach-and-return rule: move to 7, 8 or 9 above, or 1, 2 or 3 below, then come back to the 4-5-6 row.
Practice with real feedback
Home row skill is easier to build when you can see what is happening. Cheetah Typing Test runs timed tests from 15 seconds to 5 minutes with no account, shows your words per minute, characters per minute and accuracy, and assigns an animal rank from Snail up to Falcon so you can see progress. Our tips give accuracy the same weight as speed. Start with the 15 second typing test for a quick burst, then move to longer tests as your fingers settle in. The full set of tests is on the typing and clicking tests page.
If you like to mix in something lighter between drills, the site also has browser games such as the Color Memory game, the F1 Reaction Test and the 30 second click test. They are free and need no signup, and they are a good break for gamers who want to sharpen their reflexes alongside their typing.
What progress looks like
You will probably go through three stages:
- Slower than before. Moving from your old habit to correct finger placement often drops your speed for a while. This is normal and temporary.
- Accurate but unhurried. Your fingers find the keys without looking. Your accuracy rises first.
- Faster with the same accuracy. As movements become automatic, speed climbs. Experienced typists can sustain over 100 words per minute, according to Wikipedia’s touch-typing article.
Keep your weekly test scores in a note. A steady upward trend in accuracy followed by speed means the home row habit has taken hold.
FAQ
What are the home row keys on a keyboard?
On a US QWERTY keyboard, the eight home keys are A, S, D, F and J, K, L, semicolon. Counting every letter in that row, you also get G and H, for nine letters. Your thumbs rest on the spacebar.
Where should I put my fingers when typing?
Place your left pinky on A, ring finger on S, middle finger on D and index finger on F. Put your right index on J, middle on K, ring on L and pinky on the semicolon. Rest your thumbs on or just above the spacebar, and use the bumps on F and J to find the position without looking.
Do the fastest typists use the home row?
Touch typing is built around it: fingers rest on the home row and return after each reach. Experienced typists can sustain over 100 words per minute with this method. Building the habit with accuracy first is the reliable way to get there.
How long does it take to learn home row typing?
The home keys themselves can feel comfortable within days of short daily practice. Making every reach automatic usually takes longer, so judge progress with a weekly timed test rather than daily. Ten focused minutes a day beats one long session.
Why do F and J have bumps?
The bumps mark where your index fingers belong. When you feel both, you know your hands are on the home row without looking down. That lets you reset your position instantly if you drift.
Sources
- What Is the Home Row Keys? (Computer Hope)
- Where Should Fingers Be Placed on the Keyboard? (Computer Hope)
- HOME ROW Definition & Meaning (Dictionary.com)
- What is QWERTY Keyboard? (Lenovo)
- Touch typing (University of Wollongong)
- Touch typing (Wikipedia)
- Tip 47. Keep Your Fingers on the Home Row (Practical Vim, O’Reilly)
- How To Improve Your Typing Skills (Indeed)
- Dvorak keyboard layout (HandWiki)